More and more people acknowledge climate change and foresee the risks coming with it. There are a lot of ways to help the environment and reduce your carbon footprint, without having to sacrifice too much. In this article, I will go through how you can reduce your carbon footprint, have fun, and benefit from it at the same time. Everything by starting your own vermicompost.
Starting your own vermicompost is pretty cheap, requires almost no effort, helps the animals in your area, benefits your garden, and also helps to reduce emissions. There aren’t too many things to consider and everyone can vermicompost regardless of whether you have a yard or not.
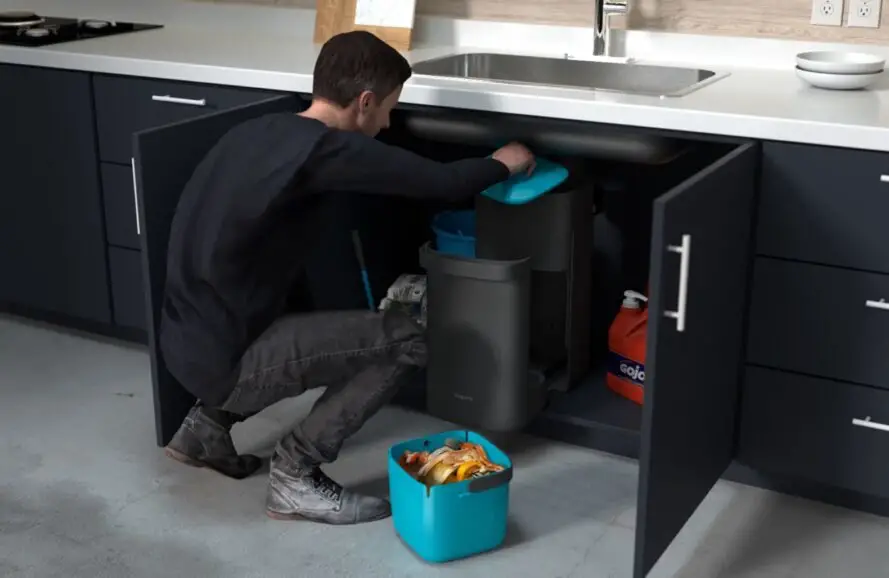
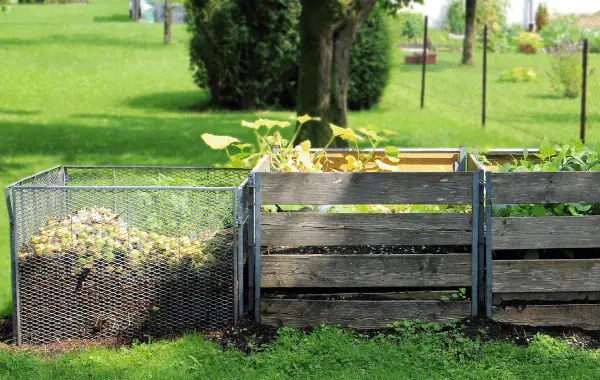
Starting your own vermicompost neither requires much time, fancy equipment, nor a lot of knowledge. The beauty of having your own vermicompost is that you decide on what scale you want to go. I have friends who have small vermicompost in a bucket under their sink, and there are those who have large wooden boxes in their yard. There is no right or wrong, and as long as it fits your needs, you are good to go.
Why you should vermicompost?
Not only are you the only one who benefits from vermicomposting. If everyone had their own compost, there would be a huge decrease in carbon emissions. Let me explain. Wasted food and food scraps are picked up by the garbage truck. These pickup trucks are not necessary for bio food and should instead be taken care of yourself. Image how much emissions these big trucks produce. If they instead could come less frequently and only pick up plastics, for example, that would be a great success for the environment.
What benefits do I have from vermicomposting
There are some excellent examples of why you should compost. Not only does it help the environment and animals, but it also benefits you. By having fresh worm castings to add to your crops you help them thrive and don’t need to invest in fertilizers, pesticides, or manure. If you have a subscription to garbage trucks coming by and picking up your trash, you can reduce the frequency they come by, which will save you money. Another benefit for you is the simplicity of it. When cutting your vegetables or peeling your onions it’s just as easy to feed the scraps to the worms instead of throwing them in a separate bag. Another benefit is the vermicompost tea you will get as a bonus. The liquid leaving the compost can be drained and used when watering your plants. But instead of plain water, the compost tea is packed with nutrients.
Wonder what fruits worms can’t eat? Read our other article here.
Can I vermicompost in winter?
This can be answered in different ways, depending on where you live, and how you are vermicomposting. Vermicomposting requires warmer temperatures and thus isn’t a factor if you do it indoors. However, if you are doing it outdoors, and live in colder regions it might be harmful to the worms. The worms may be harmed if the temperature is below 40° F or 4° C. For warmer climates like Florida, there are no worries. But if you know you get colder temperatures in the winter, you might want to have your vermicompost at a smaller scale indoors. During the colder months, the worms will dig themselves into the core where it is the warmest. The decomposition of food also increases the warmt to a small degree.
Can everyone vermicompost?
The beauty of vermicomposting is that everyone can do it. Regardless of your living situation, the only thing you need to have successful vermicompost is somewhere to store it, some worms, and a continuous supply of food scraps and brown materials. Brown materials can be anything rich in carbon. For example newspapers, dry leaves, sawdust, and straw. Worms specific for vermicompost can be bought online, brown materials can be found outside and a bin for them to keep them in can be found almost anywhere. The bin needs some ventilation holes, so you will need something sharp to make the holes with. I’ve used both an electric drill, as well as scissors.
How much does it cost to start vermicompost?
Depending on the scale you want to pursue your vermicompost career there’s a change in cost. I recommend starting small to begin with. You can easily scale up.
Since there are different scales I will give you some examples of costs connected to each size.
Smaller-scale vermicompost
If you live in a smaller household by yourself or with a partner there might not be too many food scraps to discard. A small bin below the sink might be simple enough, but I strongly recommend having two. If one gets full, you can start filling another bin while the worms convert the full one to castings. Two bins, 8-10 gallons (30-38 liters) each below the sink will work great as long as you have the space for them. Make sure the lid has latches, so any smell can’t escape. I also recommend having transparent boxes so you easily can see the progress.

Rough price estimates for smaller vermicompost under your sink
| Utensil | How many | Est. price |
| Plastic bin | 2 bins | $10 |
| Compost worms | ~500 worms | $35 |
Medium-scale vermicompost
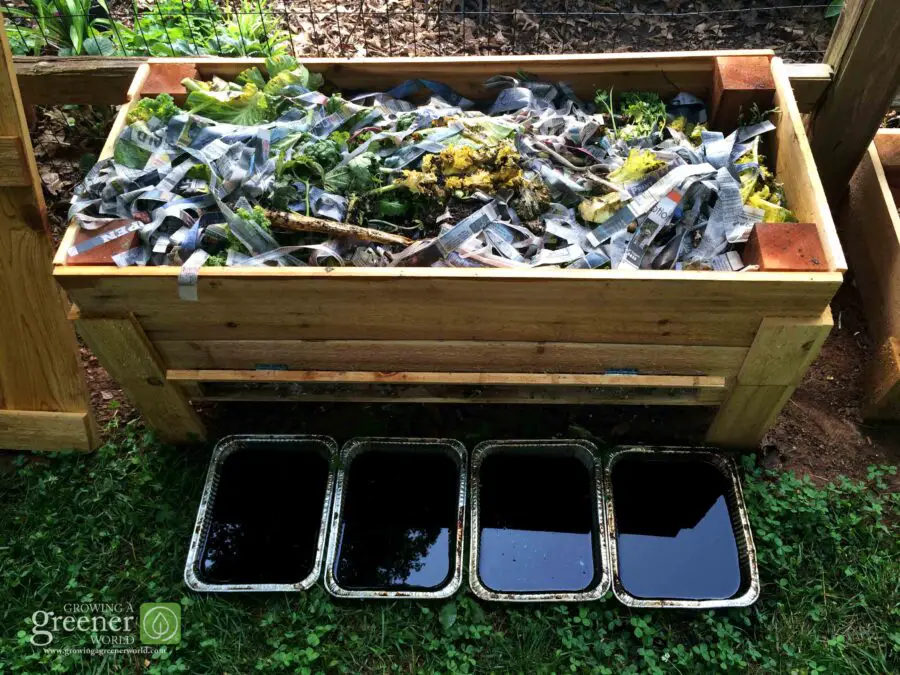
If you are more than two people living together, or have access to a yard the medium might be the one for you. You can easily access browns for the compost and have a lot of food scraps for the worms. I recommend you make space for three boxes. Two as vermicompost and the third for browns. The browns can be held by chicken wire. If you have the opportunity to elevate the two boxes you can add a tray underneath to collect the compost tea.

Rough price estimates for medium vermicompost in your yard
| Utensil | How many | Est. price |
| Wooden bin | 2 bins | $50 |
| Chicken wire | 1 roll | $10 |
| Compost worms | ~1000 worms | $45 |
If you want to elevate the bins and add a tray beneath you can buy some wood and put it beneath the edges unless you already have a clever idea on how to elevate.

How do I harvest worm castings?
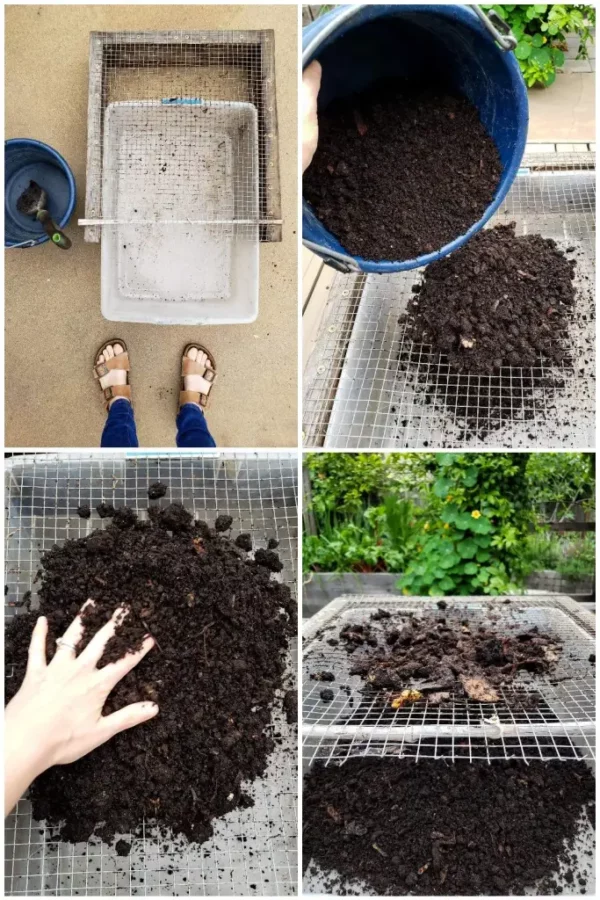
The best part about owning vermicompost is the reward. Worms leave castings filled with nutrients you can use to your advantage. When you have a lot of worms, you can count on least as many castings. Picking them up by hand is tedious, and I found that using a strainer is the easiest way to harvesting worm casting. Depending on the size of your vermicompost the strainer needs to have adequate size. For my vermicompost under the sink, I use a cat litter box scooper to strain it. Worms stay in the scooper and the castings run through the gaps. If you have larger vermicompost you might want to consider using a framed chicken wire to strain. Check the image below how Deanna does it. I got inspiration from her.

What to consider before starting vermicompost?
Before you start your journey with vermicomposting there are a few things you need to prepare first.
Collect the browns before you start, and have a huge stock on hand.
- Make room and a plan before you start. Where will you put it, and how often will you supply it with greens?
- Prepare the ventilation and drainage holes first.
- How many worms will you need? 1 pound of worms per square feet of bin surface area.
Wonder what you can’t put in your compost and what foods worms can’t eat? Read more here.
What type of worms for vermicompost?
It might be tempting to go outside and pick up nightcrawlers you find laying around for your vermicompost. Unfortunately, the nightcrawlers don’t work well in composts. They are much better at digging tunnels aerating the soil making it easier for the root systems and for the earth to breathe. The best worm for your vermicompost is red wigglers since they thrive in this environment. They eat a lot every day and love to eat our scraps. They also reproduce more quickly than other worms and aren’t trying to escape as other worms. If you want to gather worms yourself, I wrote an article with 5 tips how to catch worms for your compost here.
Compost or vermicompost – what is better?
While both regular compost and vermicompost have their own advantages and disadvantages, most people seem to prefer vermicompost. The two biggest advantages of vermicompost over regular are the speed and lack of maintenance. The purpose of composting is to break down organic matter into fertilizer. Where regular compost relies on fungi and bacteria to break down the matter which is really time-consuming, the vermiculture works much faster. With a regular compost you will need to rotate it and aeriate it regularly as well.
Vermicompost tips
My best advice for someone who already does vermicompost or wants to start is to help the worms as much as you can. For the worms to be able to eat the matter as quickly as possible, the best you can do is to make it as small as possible for them to eat.
I collect my food scraps in a small container and once or twice a week I put them inside a blender making them mush. The smell is often great but looks like a brown puré. In most cases, you’ll need to add some water for it to blend. There are no worries about adding the excess water to your compost as long as you have drainage and ventilation.
